Cross-Curricular Connections: Exploring the "Traveling West" Unit - Part 2
Jun 30, 2024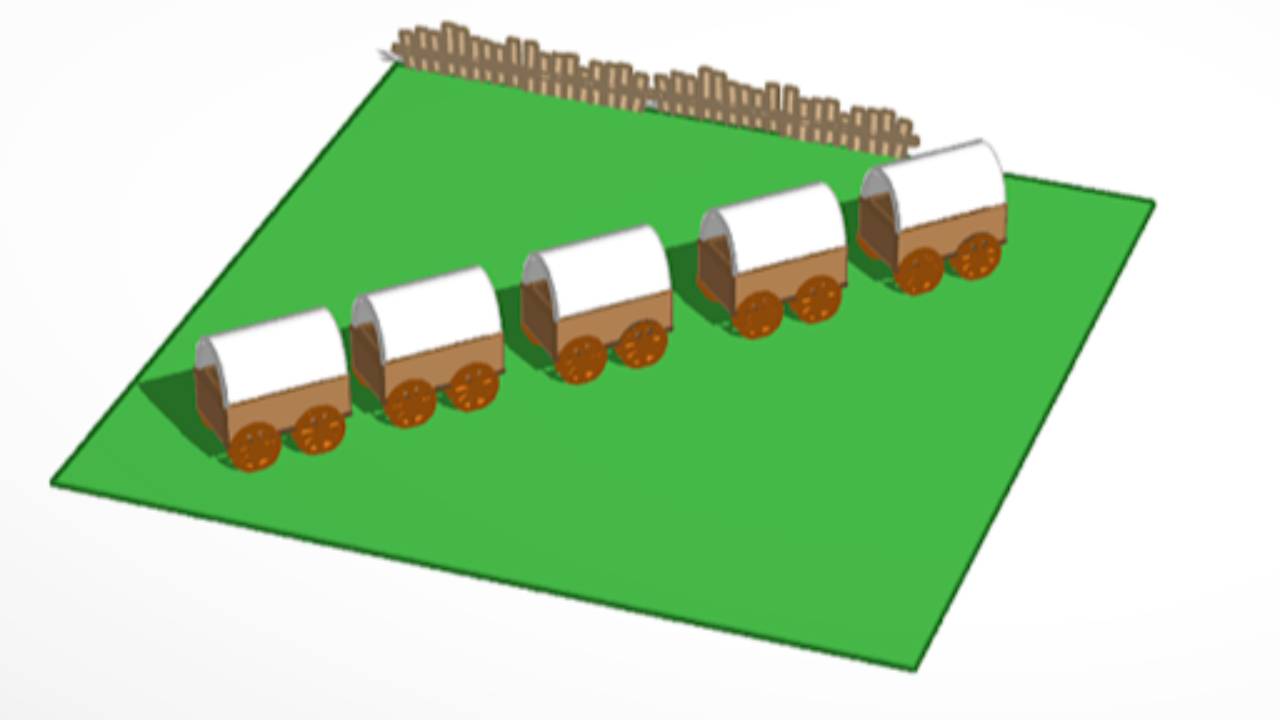
Last month, we explored the block coding portion of our “Traveling West” unit in Content Library Junior, which is centered around The Oregon Trail computer game created in 1971. Part one of this unit fuses history skills with computer programming skills to teach students how to write code that creates a simplified version of this favorite game.

In the second half of this unit, students shift from practicing programming skills to learning basic 3D design skills using the free program Tinkercad. In this submodule, students create 3D objects and buildings representative of the Westward Expansion time period. Recall that prior to starting either submodule, students spend some time learning vocabulary terms and Westward Expansion concepts that help set the context for the unit. We draw on these terms and important objects to teach this second submodule.
What is Tinkercad?
![]()
Tinkercad is a free online program in which students can create 3D designs, write code to draw 3D designs, and simulate circuits. Students have the opportunity to work with each of these skills in different Content Library Junior units, but this submodule in particular focuses on the 3D Design portion of this program.
When opening a 3D design workspace, students will see a blue 200 mm by 200 mm workplane in front of them. On the right hand side of the screen is a menu for various objects that are available in the Tinkercad library. While we teach how to use basic shapes to create more complex objects - and therefore tie in geometry skills - we also make use of some already existing objects in the Tinkercad library.

Utilizing the library of objects already created can be helpful for students who need greater support with the unit and makes it possible for students who are less experienced to still benefit from completing this module.
Using the premade objects also benefits students who may have previous experience with 3D design and modeling. For example, they might be able to include additional details in their designs and save time they would have otherwise used to create these objects from primitive shapes.
Premade objects can also serve as models for designs students want to create. Viewing a design and figuring out ways to recreate it from scratch can provide an interesting challenge for those students. They can be challenged to sketch a design plan and determine which basic shapes should be used and manipulated to create the new object.
Whether students are expert designers who can build objects from scratch or are just starting out and utilizing premade objects, they have the opportunity to use Tinkercad to design five different projects in this second submodule that build technical skills while drawing on historical knowledge.
Westward Expansion meets 3D Design
Students learn to create the following objects related to Westward Expansion out of basic shapes and premade objects.
Covered Wagon
Pioneers traveled the Oregon Trail in covered wagons pulled by animals like mules and oxen. In this lesson, we teach students to take a simple box, or a cube, and manipulate its length, width, and height to create a rectangle shape to serve as the base of the wagon. Students learn how to carve out the object so that other items like benches can be added into the base, and it is not just a solid rectangle.
Students also learn how to change the dimensions of the “round roof” shape, shown here, to create the top of the covered wagon. This involves changing its color and aligning the shape to the base of the wagon to create the canvas top.

Wheels have already been created and are part of the Tinkercad library. Students learn to use the search function on the right hand side of the screen, indicated by the magnifying glass, to search for wheels. We use the “spoked wheel” object for this project, adjusting its length, width and height as we have for the other two objects to match it with our covered wagon. Students also learn how to rotate the object and use the Align tool to align it to the wagon. Then, we copy and paste the edited wheel three more times to create the four wheels of the wagon, moving them to their correct locations on the wagon. Once all wheels have been created, students learn to use the Group function to created the covered wagon as one whole object.
Wagon Train

When working in Tinkercad, if you have two tabs open with two different projects, you can copy objects from one project to another between the two tabs. We show students how to copy the covered wagon they created in the previous lesson onto a new workplane, and then copy and paste multiple times to create a wagon train, a group of wagons that traveled together on the trail.
While students could create different wagons for their wagon train, copying and pasting ensures each wagon has the same dimensions. Students then group the wagons together to create the wagon train.
We also show students how to cover the workplane to create the ground or grass. In the Basic Shapes library, there is an object called the scale square. This object’s height can be reduced. Its length and width should be changed to 200 mm by 200 mm, as this is the exact size of the Tinkercad workplane. Then, students can change the color of this shape to green to represent grass or brown to represent the dirt trails.
Students may also want to adjust the height of the grass, raising or lowering it depending on the rest of their design. Every object in Tinkercad has the ability for a user to change its dimensions, including raising and lowering the object using the black cone above the object. We review these tools in Tinkercad to help students build upon their designs.
Sod House

A sod house was an alternate settlement to a log cabin that some pioneers built as their home when settling in the West. The Tinkercad library already contains dirt walls that can be used to resemble the walls of a sod house. We make use of other premade objects in this lesson, such as tables and chairs, to design the inside of the sod house. The inside of a sod house was one room that was typically 16 ft by 20 ft. In this lesson, not only do students practice their design skills, they are challenged to create a room for families that has everything they might need within a small space.
This lesson also provides an opportunity to review skills learned in previous designs. For example, we use the scale square to create the dirt floor of the sod house by adjusting its length, width, height and color. Students learn to manipulate the scale square in other lessons, so this provides an opportunity to review and practice these skills. We also remind students that they can copy and paste from one tab to another, and therefore they can add their wagon to the workplane, on the outside of the sod house.
General Store

Many newly established towns in the West often had a general store where settlers could buy various needed products like food, candles, clothing, and more. At this point in the module, students have learned basic design skills, as well as the different options available to them in Tinkercad, and they can use a combination of what they’ve learned to create a general store. In this lesson, we manipulate the dimensions of basic shapes, but also use premade objects. A new skill that is taught in this particular lesson is using text as a shape in the design and learning to align the text so that it is positioned properly. While we only create the outside of the general store in this lesson, students who are ready for a challenge could be given the additional task of designing the inside of the store.
Main Street

At the end of the Oregon Trail and other trails followed to move West, there was usually a town of shops and services for its new settlers. In this lesson, we review how to copy and paste across different objects in Tinkercad to create a Main Street of shops. We primarily have students copy and paste their General Store. They can then change the text of the object to reflect different shops and buildings on the main street. As this is the last lesson in the unit, this is an excellent time for students to be given a challenge if they have not been ready for one previously. We provide suggestions in the lesson notes about how students might improve their main street. Students should be encouraged to use what they’ve learned in this second submodule to add to their main street. This could also be an opportunity to research more about towns in the West and what type of stores and buildings could be found there. Because it is the last lesson, it provides some flexibility as to how students finish the project and what areas of focus should be emphasized when completing their designs.
Technical Literacy
In many of the lessons above, we talk about Grouping and Aligning objects. While not every code or design program will have this ability, many programs do, and the method of grouping or aligning objects is similar in each. Grouping, aligning, duplicating, copying and pasting are all important skills because the method of doing each of these often is similar in other programs. For example, Canva is a graphic design tool that many companies use when creating products and graphics. In Tinkercad, Canva, and the Scratch editor tool, the user needs to hold the Shift key to select the multiple objects that are going to be grouped or aligned. Learning this skill in this module in Tinkercad sets students up for success when using other programs like Canva and Scratch.

We also review how to use the keyboard to complete some of these functions. Selecting Ctrl-C and Ctrl-V (or Command-C and Command-V on a Mac) is a way to copy and paste using the keyboard and without needing to use the Copy and Paste tools within the program. We review this concept in multiple Content Library Junior lessons. Practicing using the keyboard to copy, paste, duplicate and carry out other functions is so important to building technical literacy as many students today have difficulty when navigating the keyboard. These commands, while simple, help build familiarity and ease student ability to use the keyboard, which is a critical skill for the majority of jobs in the workforce in today’s world.
Math Skills

This submodule contains a bonus lesson that explores how to design a sod house to scale in the Tinkercad workplane. The Tinkercad workplane is measured in millimeters, but sodhouse measurements are typically in feet. We equate 1 ft to 10 mm to be able to create a 16 ft x 20 ft sod house within the workplane. Students learn to set ratios and use cross-multiplication along with division to determine the accurate measurements for their sod houses.
A Packed Unit
Our Traveling West unit is an excellent choice for older elementary students who have learned a bit of code and 3D design before, and are ready to challenge themselves. While we write all Content Library Junior lessons so that beginners can complete them, this is a longer unit that interweaves a combination of so many different types of skills. From the xy-coordinate plane to creating designs to scale, from creating lists to writing conditionals, from practicing programming skills to applying historical knowledge, this is a very involved unit that shows our students the importance of utilizing a combination of skills to solve problems and create projects. This unit provides an appropriate challenge for our programming students while simultaneously covering a variety of knowledge and skills. Summer is an excellent time to start planning how this unit can fit into your curriculum next year, or you may decide your students could benefit from some summer activities to keep engaged. However you decide to use this unit, we know it will help teach 21st century skills and provide your students with a strong technical foundation that is ever more increasingly desired in the workforce and in our world today.
Stay connected with news and updates!
Join our mailing list to receive the latest news and updates from our team.
Don't worry, your information will not be shared.
We hate SPAM. We will never sell your information, for any reason.
